


Everyone in my family has a preferred birthday cake — naturally — and they never really change. My sister’s? Funfetti cake, as in Funfetti from the Pillsbury box. My Dad’s? Fruit cocktail cake: box yellow cake mix with canned fruit cocktail mixed in and Cool Whip on top (which I might also make a version of some time.) Mine? This. Of course, I don’t make it easy on anyone, including myself. My mom’s birthday is coming up at the end of September, and every year, she makes (or we make for her) what has always just been called “picnic cake”.
What Is Picnic Cake?
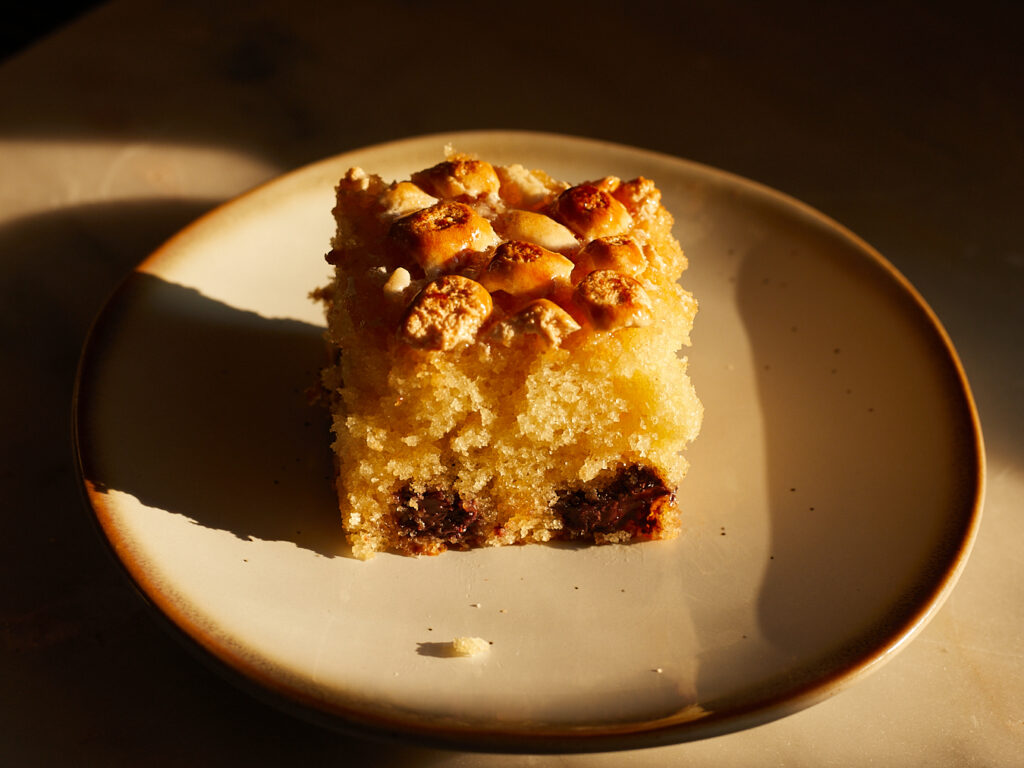
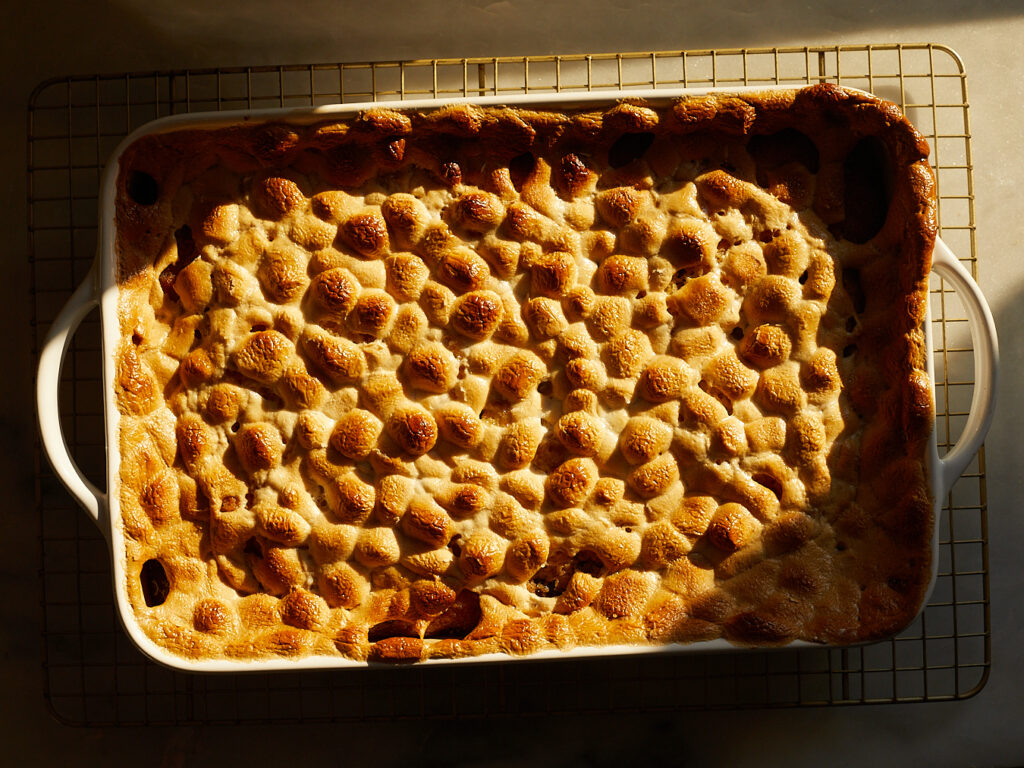
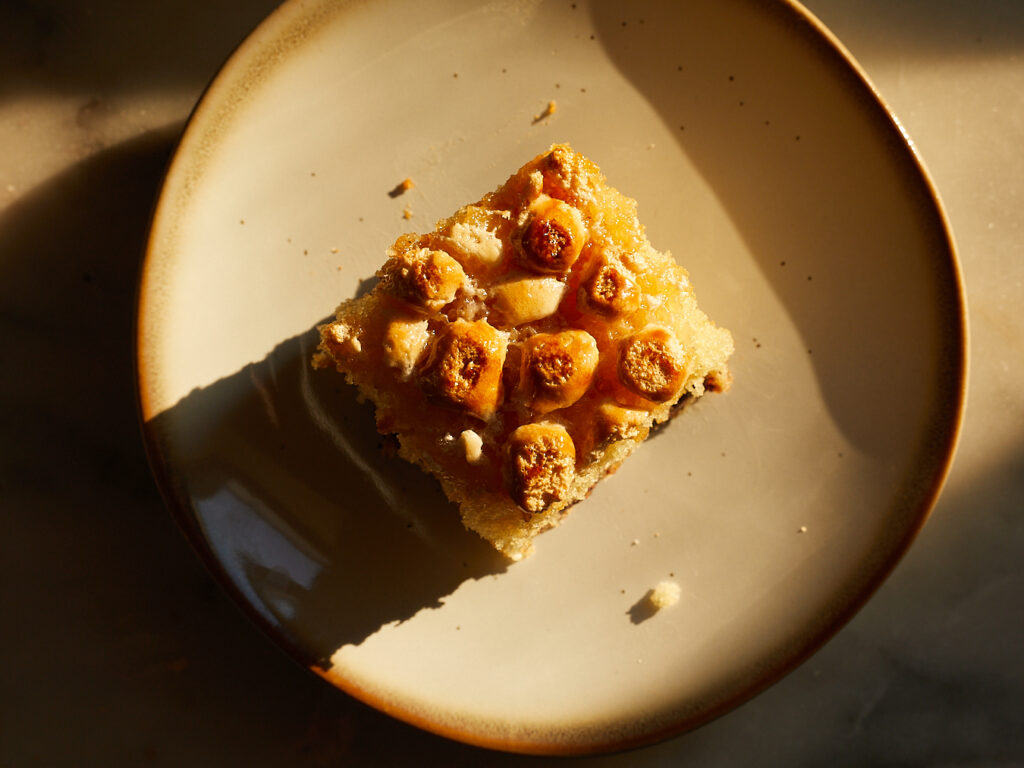
It’s yellow cake from a box mix, with chocolate chips and marshmallows scattered on top, then baked. For a my whole life, I just thought “picnic cake” was simply *this* cake, but come to find out it loosely refers to any single-layer cake that is baked and frosted in the same tin, and can easily be transported and served to many people at, let’s say, a picnic!
“This was a cake my mom made for us,” my mom explained to me over text, noting that because the marshmallows toast on top, you don’t have to frost it. “One layer. Not messy. This would become my birthday cake every year growing up and grown!” She says that a traditional picnic cake is a yellow cake with thick chocolate icing, but I can’t find much information otherwise about picnic cakes online, and everyone seems to have their own version of one. Shockingly, my mom and I haven’t come across anyone who does picnic cake quite like this, and we’re not really sure where my grandma got the inspiration, if anywhere. If you know of more resources about picnic cakes or have your own picnic cake recipe, I would love to hear about it! [Note: After posting about this on TikTok and Instagram, a small few people have come forward saying that they’ve also tried this cake at family events. One said their grandma got it from a magazine in the 60s. Others still mentioned variations like s’mores cake, dump cakes, or other picnic cakes like “beer-box cakes“.]
How to Make Chocolate Chip-Marshmallow Picnic Cake
I wanted to make an EGO version of this formative dessert that was just one step up from box mix. (Although I don’t know if my family will accept it for my mom’s birthdays going forward.) But also, store bought really is fine sometimes, so if you want to follow my mom’s directions for box mix, do it! Here they are, word for word:
Make yellow cake mix as directed. Pour into 9×13 pan. On top of batter, drop choc chips, 3/4 bag. Cover chips with bag mini marshmallows. Press lightly. Bake as directed on box.
Why This Recipe Uses Reverse Creaming Method
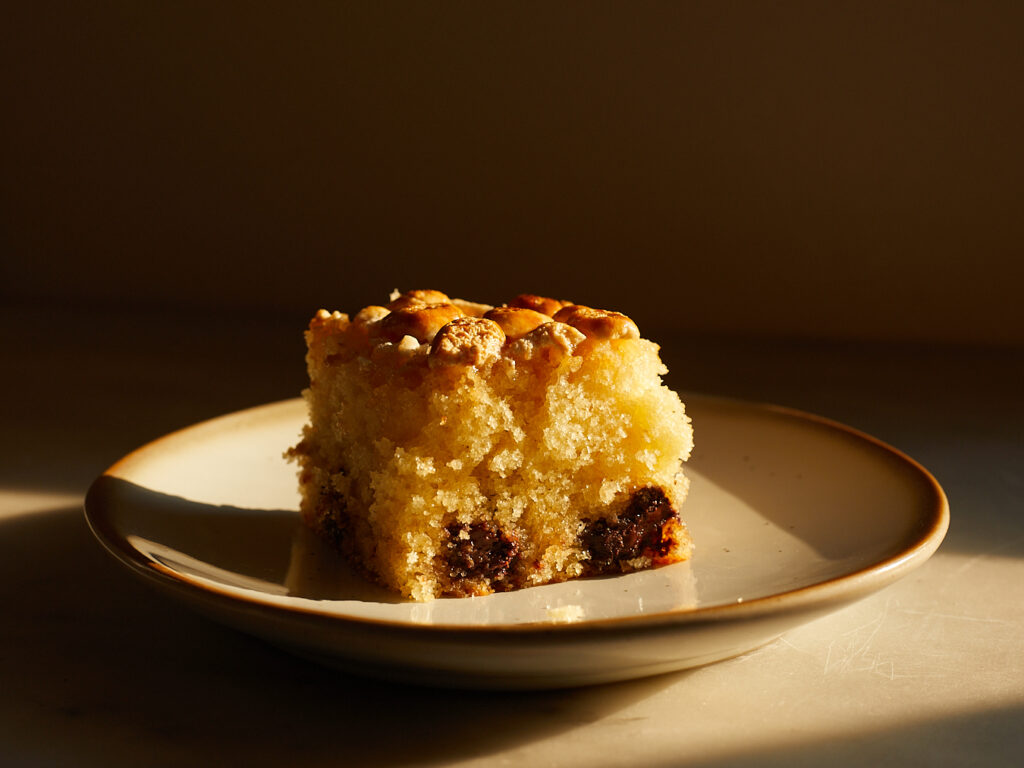
In this version, we’re using the reverse creaming method where dry ingredients are mixed with softened butter before adding liquids. This is instead of the traditional creaming method where butter and sugar are beaten together, then the eggs are added, and then alternating the wet and dry ingredients. The reverse creaming method attempts to prevent excess gluten development by coating the flour pieces in butter, resulting in a cake that is more tender, has a more even structure, and bakes up flatter.
Other Notes and Tips for Success
I also found that, due to this cake having a lot of liquid and eggs, it didn’t bake as fast under the blanket of marshmallows. So by the time the center cooked, the edges overcooked and the marshmallows evaporated or went a little past toasty. That’s why we’re adding the marshmallows toward the end of baking. This means the cake’s structure can set up, the water can evaporate from the batter, and the marshmallows don’t over-cook. I use a 9×13 pan that’s a little over 2 inches deep. I know some of the glass Pyrex ones are more shallow, so be sure to only fill the pan about halfway. Otherwise, you could have some overflowing marshmallows. (We put a tray underneath just in case to catch any spillage.)

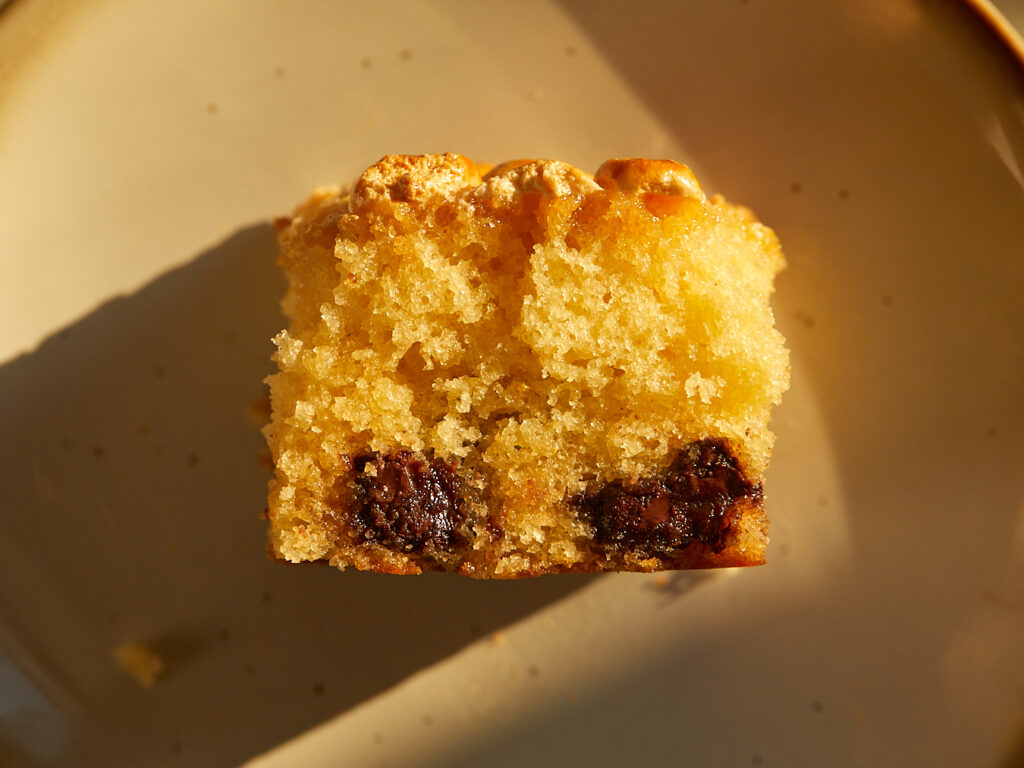
This is not the prettiest cake in the whole world, but it is super portable, very unique and a little retro. The marshmallows get toasty and sticky, and almost seep into the top of the cake, keeping it really moist. Despite the pictures, the chocolate chips actually don’t all sink to the bottom. (With the box mix version they usually do, and that’s how my family likes it!) It’s so fluffy and bright yellow thanks to its use of four large eggs. And with lots of vanilla and buttermilk, it is reminiscent of that nostalgic box mix, but also feels pretty luxurious.
Want more recipes like this? Try…
- Lemon Ricotta Olive Oil Snacking Cake
- Cornbread Snacking Cake with Honey Cream Cheese Frosting
- Sour Cream Chocolate Chip Bundt Cake
Chocolate Chip-Marshmallow Picnic Cake
Ingredients
- 2 2/3 cups all-purpose flour 347 grams
- 1 1/2 cups granulated sugar 315 grams
- 1 1/4 teaspoons baking powder
- 1/2 teaspoon baking soda
- 1 teaspoon kosher salt
- 12 tablespoons unsalted butter softened (170 grams)
- 1 cup whole buttermilk at room temperature (242 grams)
- 1/4 cup vegetable oil 56 grams
- 2 teaspoons vanilla extract
- 4 large eggs at room temperature
- 1 heaping cup semi-sweet chocolate chips about 6-7 ounces or half a bag
- 1/2 to 2/3 bag of mini marshmallows 5-7 ounces
Instructions
- Grease a 9x13x2-inch pan with butter or baking spray and preheat the oven to 350°F.
- In the bowl of a stand mixer fitted with the whisk attachment, combine the flour, sugar, baking powder, baking soda and kosher salt. Add the butter and run on medium-low speed until the butter is well incorporated and the mixture looks sandy. There should be no lumps of butter. (You could also do this with a hand mixer it will just take longer.)
- In a large glass measuring cup or small mixing bowl, combine the buttermilk, vegetable oil, vanilla and eggs.
- Switch the mixer to the paddle attachment. With the mixer on running on low, gently stream in the liquid ingredients. Once all the liquid has been added, scrape the bottom and sides of the bowl and return to mix on low for a few more seconds.
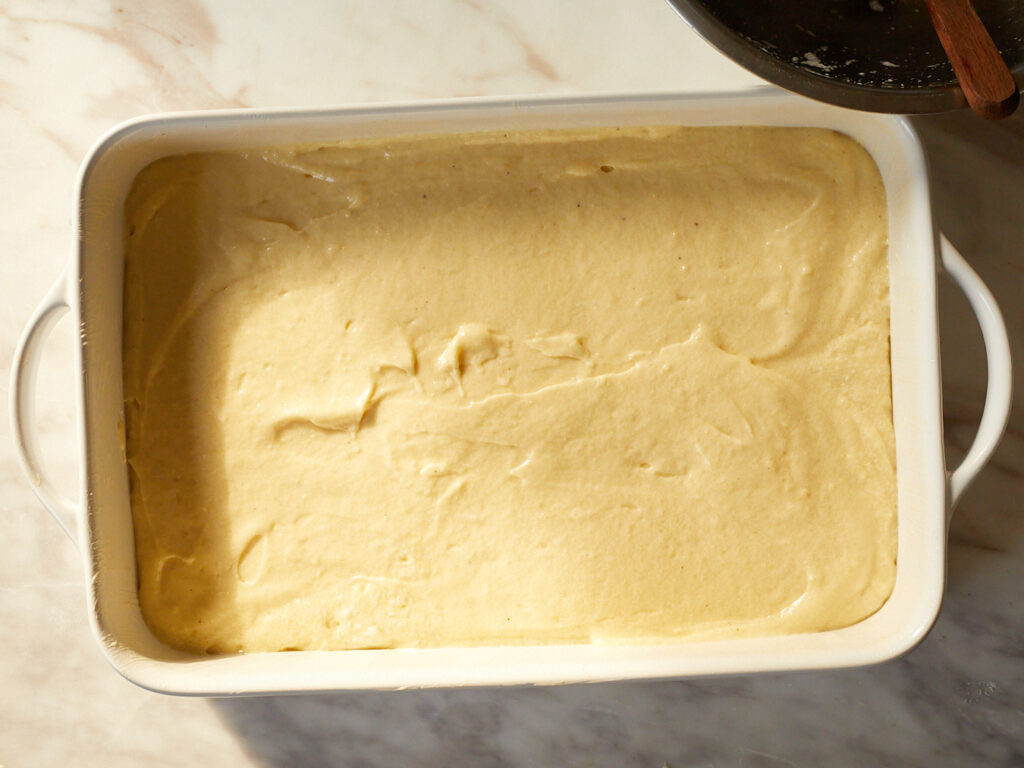
- Pour the batter into the prepared tin and spread it out evenly with a rubber spatula, offset spatula or the back of a spoon.
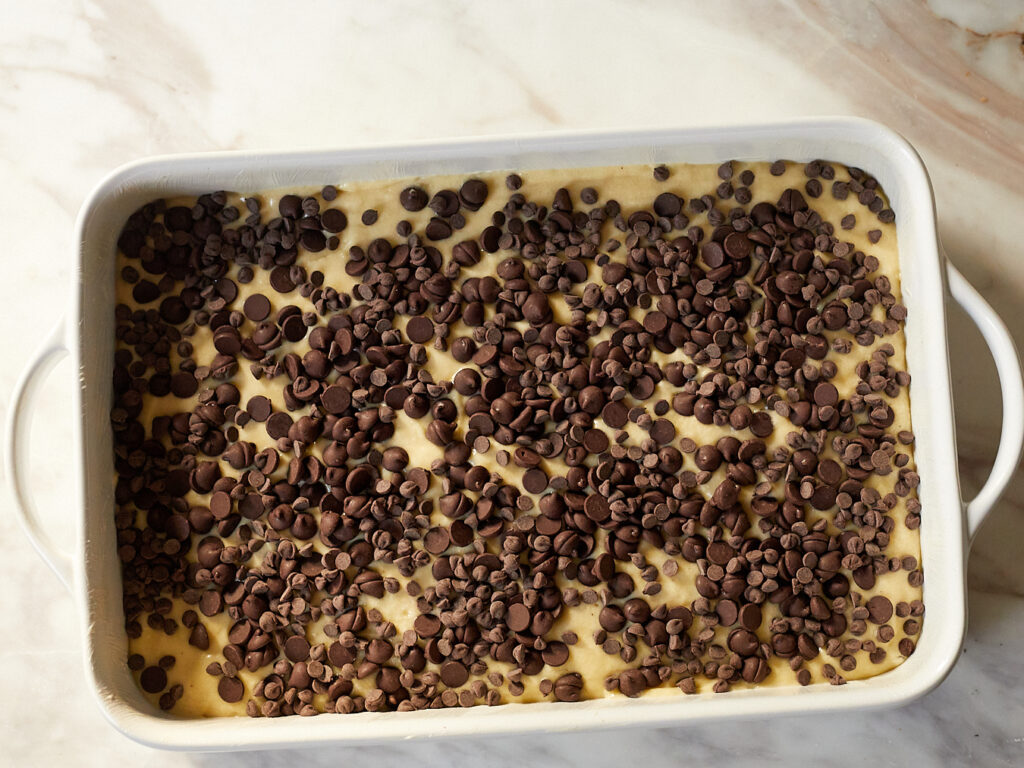
- Scatter the chocolate chips evenly over top. You should still be able to see plenty of batter underneath.
- Place on the center rack and slide a half sheet tray on a rack underneath to catch any marshmallow spillage. Bake for 28 minutes and then very gently pull out the oven rack the cake is on and top the cake with the mini marshmallows, just enough to barely cover the surface. This doesn’t have to be perfect (they will melt and spread out anyway) but you do want to get it back in the oven very quickly to prevent it from deflating any further.
- Bake for 7 more minutes. A wooden skewer poked into the center of the cake should come out with very moist crumbs.
- Transfer to a wire rack to let cool completely before serving.
Notes
- I use a 9×13 pan that’s a little over 2 inches deep. I know some of the glass Pyrex ones are more shallow, so be sure to only fill the pan about halfway or you could have some overflowing marshmallows. (We put a tray underneath just in case to catch any spillage.)
Let's keep in touch...
Newsletter subscribers receive early access to new recipes, my best recipe, culture and product recommendations, and updates on all things easygayoven.
(Plus, paid members receive a bonus, exclusive recipe every month!)
For even more, follow along on Instagram and TikTok @easygayoven and at easygayoven.substack.com
© easygayoven 2022 | design by tonic

+ Show / Hide Comments
Share to: