


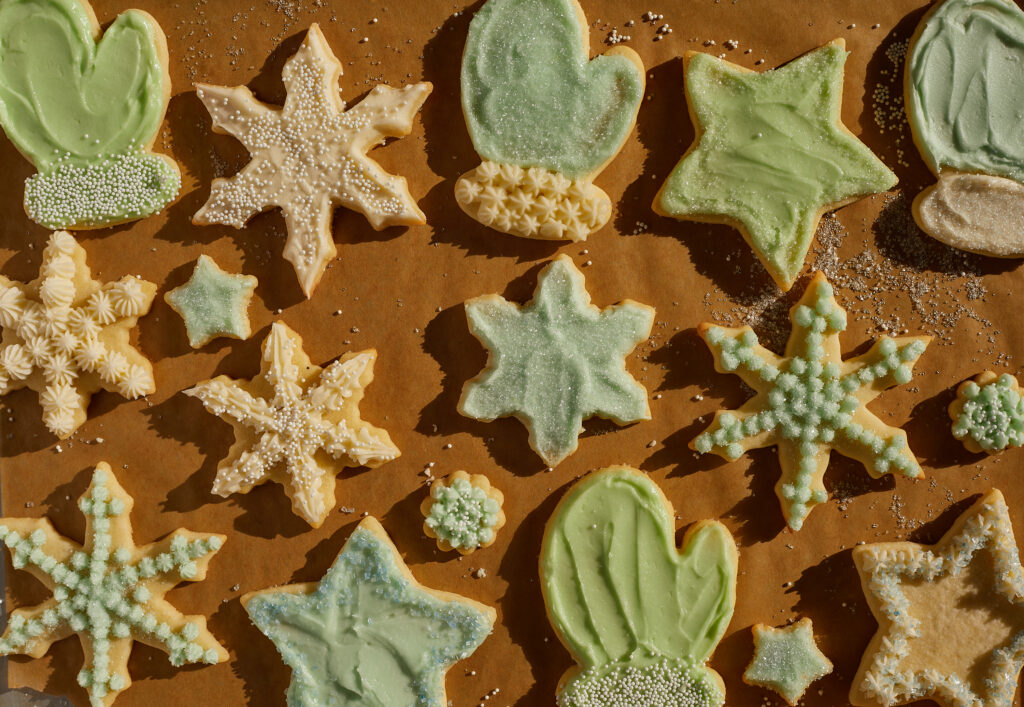
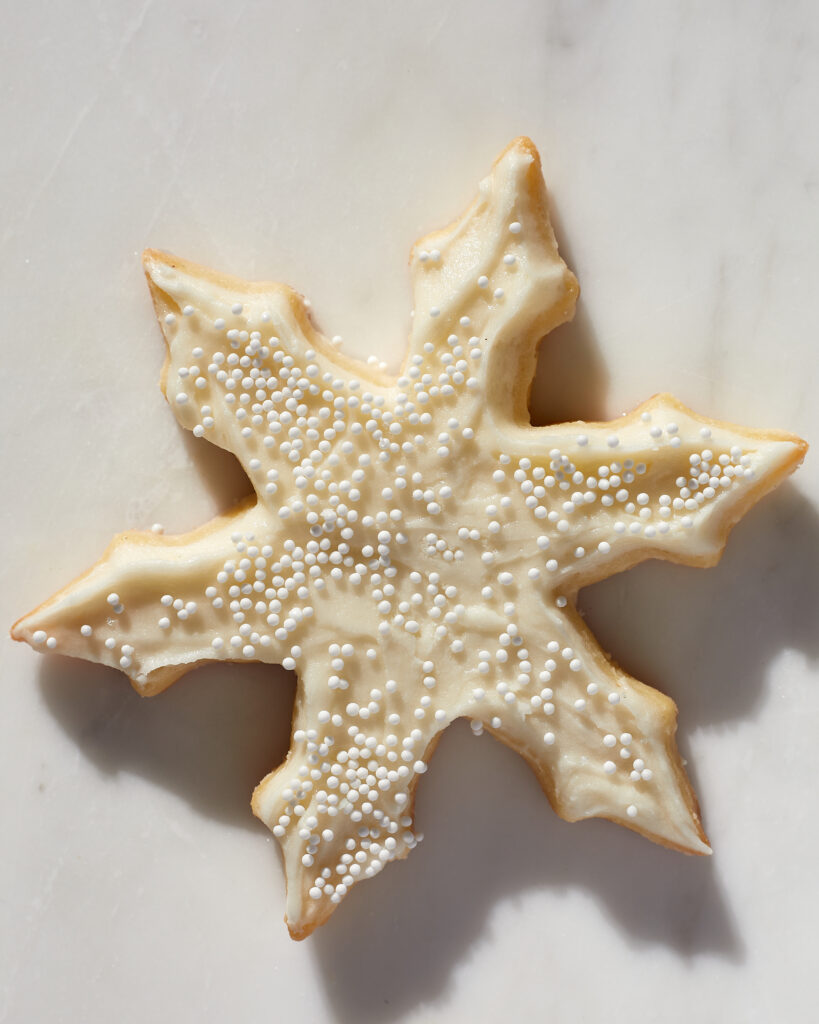
The catch-22 of holiday sugar cutout cookies, or really any cutout cookies, is that with more ingredients butter and egg comes better flavor and texture, but also more spread in the oven. And if you tirelessly spend an afternoon cutting out intricate shapes of trees, mittens and snowflakes, you want them to keep that shape. Meanwhile, flour thickens up dough and stops the spread, but add too much and your cookies can come out powdery, and flavorless.
I humbly believe I have cracked the perfect balance with these cookies. They’re crisp on the edges and soft in the middle, while still maintaining that rich flavor from butter, egg and lots of vanilla. And they don’t spread (like maybe a millimeter if we’re splitting hairs) but hold their shape for a pristine looking final product.

Using a food processor for cookie dough
Here’s the best part about this recipe: If you use a food processor (I have directions for food processors as well as stand and hand mixers) you can use butter straight out of the fridge and roll out the dough straight away! No waiting for butter to come to room temperature or trying to force a rock-hard disc of dough into a flat sheet. And all the methods save your countertops and rolling pins from stuck-on dough, as we’re rolling it out between two sheets of parchment. This also prevents you from incorporating too much flour when dusting your work surface or pin. I like my sugar cutout cookies on the thicker side, so I’ve written this recipe for cookies that are 1/4-inch thick, but you could take them down to 1/6-inch — just note that will shorten their baking time.

Salted vs. unsalted butter
With this recipe, I divert from my usual preference of unsalted butter. Different brands of butter can actually vary in their salt content, and because of that, bakers and recipe developers like to use unsalted butter to have more control and consistency. However, I find that there is something undeniably nostalgic about the taste of salted butter, and it imparts a much richer flavor to admittedly very plain cookies, which is why I call for it in this recipe. If you want to use unsalted butter for the cookies and buttercream, you can. Just add about 3/4 teaspoon of kosher salt or 1/4 teaspoon table salt to flour mixture in step one, and add 1/4 teaspoon of kosher salt or a small pinch of table salt to the buttercream in step 7.

Here are 3 tips for making these holiday sugar cutout cookies
1. Chilled dough is happy dough. Whenever you think the dough is sticking too much, or the cutters are starting to break off the arms and legs of your reindeer and gingerbread men, stick it back in the fridge. Just do it. Simply dousing your pin and dough in flour will make the cookies dry and tough. Blasting the cut-out cookies with 5 minutes of extreme cold in the freezer before they bake also really helps with maintaining their shape.

2. How to transfer the cutouts without breaking them: Dipping your cutters in a little bit of flour can help them avoid sticking, but sometimes the cutter just picks up the cookie, which is nice because then you can just encourage it out onto the sheet with your finger. Make sure the dough is really chilled. If you’ve pressed cutters all over the dough but haven’t transferred the cookies to the baking sheet, a few minutes in the fridge would make transferring all the more easy. I like to remove all the excess dough around a cutout, then angle a a small offset spatula flat under the cutout and shimmy it back and forth to loosen the cutout from the parchment.
3. This dough can be rolled out once, then re-rolled 2 more times. After that I would discard any scraps as the dough can become tough from too much working and flour. Using small cookie cutters can also help use up dough left between bigger shapes.
Halloween Sugar Cutout Cookies
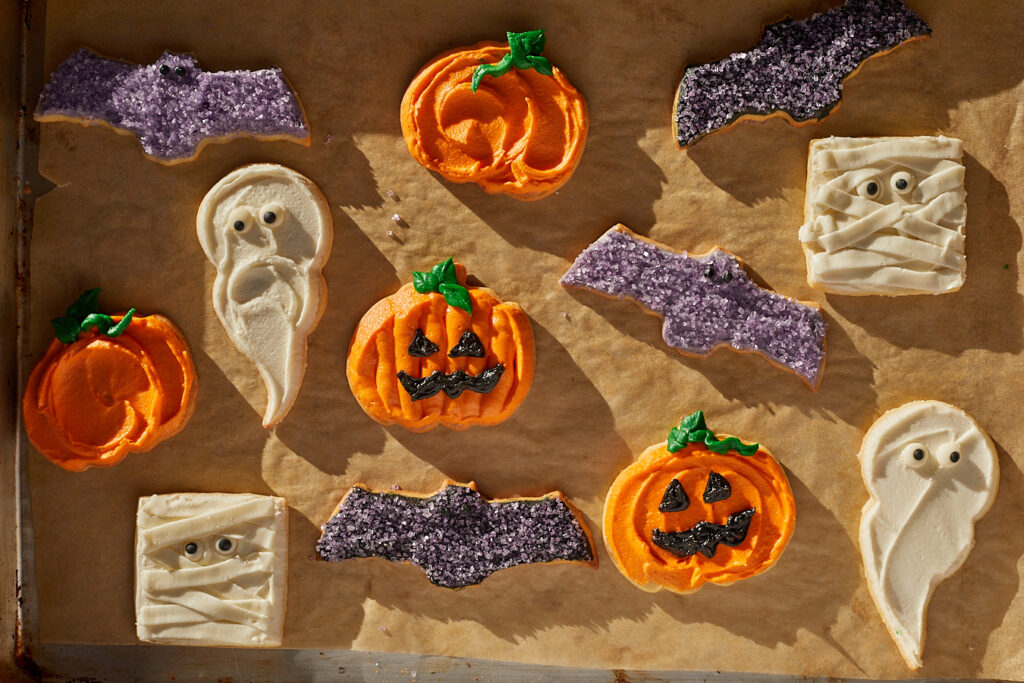
Of course, why wait until November/December for sugar cutout cookies? I decorated these cookies for Halloween making pumpkins, bats, mummies and ghosts.
Here are some of the tools I used:
–Mini offset spatula, my fave for spreading anything on anything
-Wilton 12 tip for piping stripes on a pumpkin
–Ateco 46 tip for piping the strips on the mummy cookie
-Purple sanding sugar
–AmeriColor gels
-Candy eyes from a specialty baking store
–Small tip-less piping bags
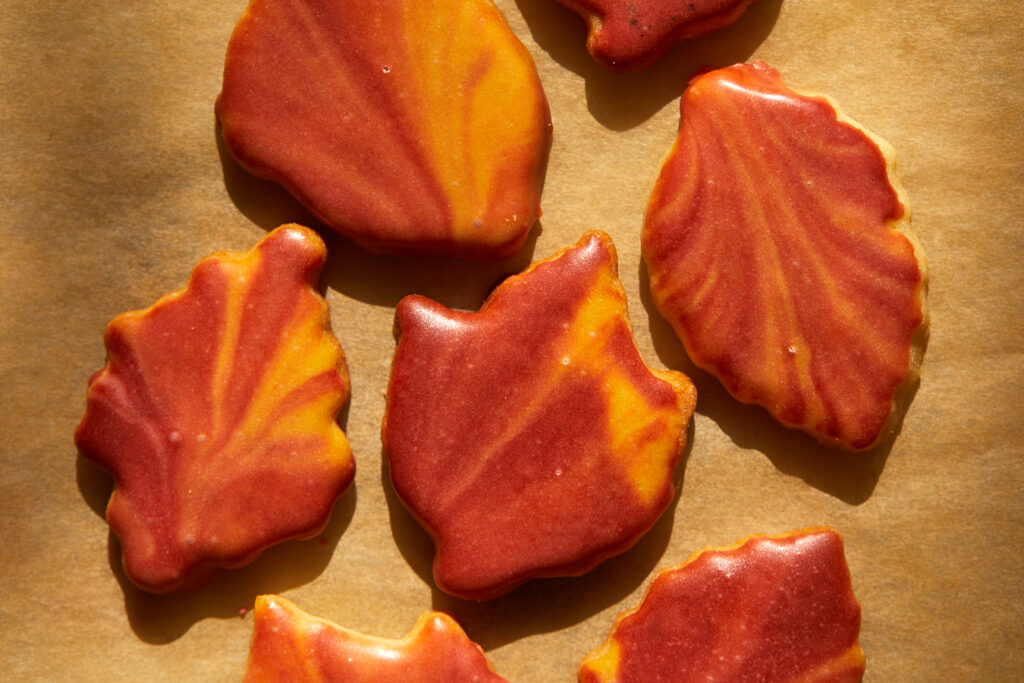
I used some of the scrap dough from my Halloween sugar cookies cutouts to make these little leaves for fall. This is one of the easiest techniques to decorate with royal icing (here’s my favorite recipe for it) if you don’t trust your frosting or piping skills.
Just mix a few colors from a similar palette, varying from dark to light, pour a base color into a shallow bowl, then pour the icings in going from dark to light. Just barely swirl them otherwise they’ll run together when the cookie is pressed into the icing. Dip the very tops of the cookies into the icing, let the excess drop off and place them on a wire rack to dry. You can add more drizzles of color and swirl into the icing bowl as you go! I obviously did leaves but you can get creative with black and whites or yellows for stars and moons, purples for bars and cats, oranges for pumpkins. Whatever you want!
Did you make these holiday sugar cutout cookies? I want to see! Tag me @easygayoven on TikTok and Instagram.
Holiday Sugar Cutout Cookies
Ingredients
Cookies
- 2 cups plus 2 tablespoons all-purpose flour (276 grams)
- 1/2 teaspoon baking powder
- 1/2 teaspoon cream of tartar
- 3/4 cup granulated sugar (158 grams)
- 3/4 cup salted butter (12 tablespoons) (169 grams)
- 1 large egg
- 2 teaspoons vanilla extract
Buttercream
- 10 tablespoons salted butter, at room temperature (141 grams)
- 4 cups powdered sugar (448 grams)
- 3 tablespoons salted butter, melted and cooled (42 grams)
- 2 teaspoons vanilla extract
- 2-3 tablespoons whole milk
Instructions
- Make the cookies. In a small mixing bowl, whisk together the flour, baking powder and cream of tartar. Set aside.
- If using a food processor: In the bowl of a food processor fitted with the blade attachment, add the butter cubes and sugar. Turn the food processor to low speed until they are totally combined. You may have to spread the mixture around with a rubber spatula if gathering up and missing the blades. Add the egg and vanilla extract and pulse a few times until homogenous, running the rubber spatula along the sides and bottom to ensure everything is incorporated. Pour in the flour mixture and pulse until the dough comes together and begins to ball up. Dump the dough out onto a large piece of parchment paper that’s been lightly dusted with flour. Place another piece of parchment on top and roll the dough out with a rolling pin it is 1/4-inch in thickness. You might have to split the dough in two to do this. Chill in the refrigerator for about 30 minutes or until the dough is firm and cold.
- If using a stand mixer or hand mixer: In the bowl of a stand mixer fitted with the paddle attachment, or with a large mixing bowl and a hand mixer, beat the softened butter and sugar until combined. Beat in the egg and vanilla extract, scraping down the sides and bottom of the bowl halfway through, until everything is homogenous. Pour in the flour mixture and mix on low just until the dough begins to come together, the mixture is crumbly, and the last streaks of flour disappear. Form the dough into a disc, as flat as you can, and wrap it i plastic wrap. Chill for about 30 minutes before rolling out. Once chilled, roll the dough out with a rolling pin between two sheets of parchment paper until it is 1/4-inch in thickness. You might have to split the dough in two to do this. Chill in the refrigerator for about 30 minutes or until the dough is firm and cold.
- Cut out the cookies. Remove the top piece of parchment and cut out as many shapes as you can. (Starting from the edges and then working in helps.) I recommend rolling out the scraps only 2 more times, ensuring that you chill and flour when the dough gets too warm and sticky.
- Transfer as many cutouts as you can to a half sheet tray lined with parchment paper, leaving a little space between them (they won’t spread.) Before baking, place them in the freezer (or fridge if that’s not an option) until they are very cold and hard.
- While the cookies are chilling, preheat the oven to 350°F.
- Bake one tray at a time on the middle rack for about 8 or 9 minutes, rotating the tray halfway through — or until the cookies are set, dry, and just starting to get a little light brown color on the edges. (Smaller cookies and cookies with sharp appendages tend to cook and brown on the edges faster, so keep an eye on them.) If you prefer soft cookies, undershoot the timing by about 1 minute — and if you like very crisp cookies, leave them in for about a minute or two longer, while making sure you avoid over-browning or burning.
- Allow the cookies to cool on the sheet tray for about 5 minutes and then carefully transfer them to a wire rack.
- Make the buttercream. Using a hand mixer and a large mixing bowl, or a stand mixer with the paddle attachment, beat the butter until it’s smooth. Add the powdered sugar and vanilla extract and beat on low speed until the mixture is creamy and thick. Pour in the melted and cooled butter and beat just until combined. Depending on how thick you want your buttercream, mix in 2 or 3 tablespoons of the whole milk.
- Decorate the cookies using a small offset spatula, piping bags, a butter knife or even the back of a spoon. Finish with sprinkles and sanding sugars, if desired.
- Allow the cookies to set for about two hours, uncovered (so the buttercream has a chance to crust over) before attempting to stack and store them in an air-tight container.
Leave a Reply
Let's keep in touch...
Newsletter subscribers receive early access to new recipes, my best recipe, culture and product recommendations, and updates on all things easygayoven.
(Plus, paid members receive a bonus, exclusive recipe every month!)
For even more, follow along on Instagram and TikTok @easygayoven and at easygayoven.substack.com
© easygayoven 2022 | design by tonic

I made these cookies for Christmas and they were PERFECT. Tasted amazing, directions were easy to follow, and the cookies were easy to make. I will definitely make these every year (and probably not just at Christmas!)
Thank you so much for trying them! I’m glad they are your new go-to!
I made these cookies for Halloween and they were delicious. I have never had any success with sugar cookies before. Planning to make them again for Thanksgiving and Christmas. Thanks for a great recipe !
I made these twice in two days because they were really good. The cookies dough comes together quick and rolls out really easily. I did have to bake it about double the time in the recipe- but all ovens are different. The cookie by itself is really tasty. The frosting is great cause it crusts and makes them stackable. It does make a lot- more than double what you’d need to decorate all of them. However making such a small amount of frosting is a pain so I get it. Overall, I really like this recipe.
Thanks for trying them! I like a lot of frosting ha —Eric