


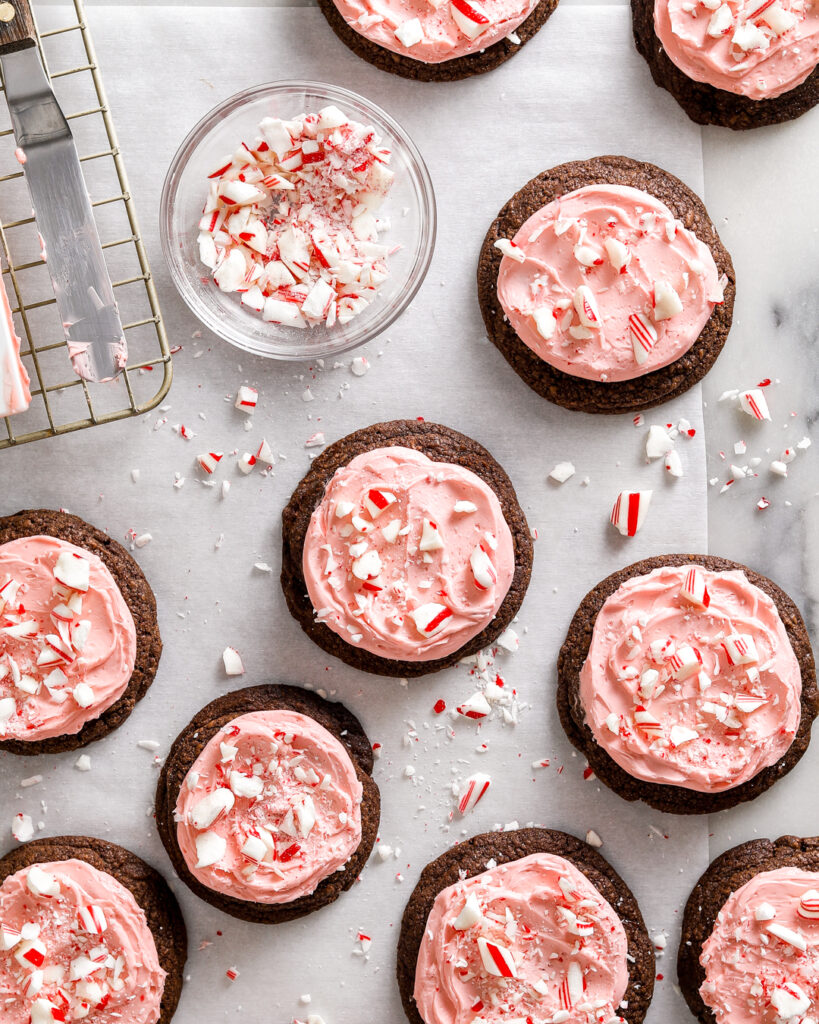
Few holiday treats loom larger in my memory than peppermint chocolate chip cookies from Cheryl’s Cookies. Growing up in central Ohio, Cheryl’s was “a thing”. Started in 1981 by college roommates in Columbus, now they’re a national brand owned by 1800-Flowers. Fun fact (maybe only to me) my dad was once neighbors with the eponymous Cheryl! [Okay, reader, upon further consultation with my father, Cheryl might have actually been neighbors with me myself when I was growing up. We never met, which is tragic.]

I remember going to the brick and mortar store around the holidays and getting *these* cookies. They used to be topped with peppermint candy pieces, but those have since been replaced with sprinkles…. Ladies … choices.
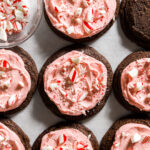
I set out to make a copycat version that anyone can easily make at home. And, of course, I’ve honored the original topping here because it’s. just. better.
Here are 3 tips for making peppermint chocolate chip cookies
- I prefer using chopped chocolate, not chocolate chips. This helps the cookies spread better, but I’m not as strict about this preference here as I am with the best-ever chocolate chip cookies, which rely on big hunks of chocolate to spread and bake correctly. So if you only have chocolate chips, you can use those.
- If you don’t like super strong flavors, consider just adding half or two-thirds of the peppermint extract at first and taste-testing. It is powerful stuff and will continue to flavor the buttercream as it sits. See how you like the taste, and then you can always add a bit more if you want.
- A little food coloring goes a long way. Just a tiny drop of pink or red food color is probably enough to color this whole batch of frosting. In fact, I recommend starting off by just dipping the end of a toothpick or cake tester in the gel color and wiping it onto the beater of the mixer. You can always add more but you can’t take it away!

Did you make these cookies? I want to see! Tag me @easygayoven on Instagram and TikTok.
Peppermint Chocolate Chip Cookies
Ingredients
Chocolate-chocolate chunk cookies
- 1 cup unsalted butter, melted and cooled (2 sticks) (226 grams)
- 1/2 cup sugar (100 grams)
- 1/2 cup lightly packed brown sugar (100 grams)
- 1 large egg plus 1 yolk
- 1 teaspoon vanilla
- 1 1/2 cup 210g all-purpose flour
- 1/2 cup cocoa powder (50 grams)
- 1/2 teaspoon baking soda
- 1/2 teaspoon salt
- 5 oz. dark or semi-sweet chocolate chopped into chunks
Peppermint buttercream
- 5 tablespoons salted butter, at room temperature (71 grams)
- 2 cups powdered sugar (224 grams)
- 1 teaspoon vanilla extract
- 3/4 teaspoon peppermint extract
- 2 tablespoons salted butter, gently melted (28 grams)
- 1-2 tablespoons whole milk
- red food coloring
- peppermints or candy canes crushed into bits
Instructions
For the cookies:
- Preheat oven to 350° F. Line two sheet pans with parchment paper.
- In a stand mixer with a beater attachment, cream together the melted butter and sugars until well combined.
- Add the egg and yolk, one at a time, mixing after each addition. Add vanilla and mix to combine.
- Scrape down the sides and bottom of the bowl.
- In a medium-sized bowl, whisk together the flour, baking soda, cocoa powder, and salt.
- Set mixer to low. Slowly add in the dry ingredients.
- Once the last traces of flour disappear, mix in the chocolate chunks. Do not over-mix.
- Remove bowl from mixer and run a rubber spatula around the bottom to make sure everything has been incorporated.
- Dole out about 18, 2-tablespoon dough balls (I like to use a cookie or ice cream scoop) onto the parchment-lined pans, leaving about 2 inches between each ball.
- Chill the pre-portioned dough in the fridge for 20 minutes. (This is crucial because it firms them up so they don’t spread as much.)
- Bake for 7 minutes, then swap and rotate the trays to promote even baking, giving each tray a solid *thwap* on the counter before returning to the oven.
- Bake for 7 more minutes, then remove from the oven. After five minutes, transfer the cookies to a cooling rack.
For the buttercream:
- While the cookies are cooling, make the buttercream.
- In a stand mixer fitted with the paddle attachment, beat the butter on medium speed until light in color and fluffy.
- Add the powdered sugar and mix until combined.
- Scrape the bowl, then add in vanilla, peppermint extract, and a pinch of salt.
- Beat the mixture just until it has all come together.
- Add just the tiniest drop of red gel food coloring and beat to make a light pink color. Remember, you can always add more color, but you can never take it away!
- Scrape down the sides of the bowl, then turn the mixer to low and let it run for about 3 minutes. This will help rid the buttercream of air bubbles.
Assembly:
- Frost the cookies with the buttercream and sprinkle with crushed candy canes or peppermints.
Leave a Reply
Let's keep in touch...
Newsletter subscribers receive early access to new recipes, my best recipe, culture and product recommendations, and updates on all things easygayoven.
(Plus, paid members receive a bonus, exclusive recipe every month!)
For even more, follow along on Instagram and TikTok @easygayoven and at easygayoven.substack.com
© easygayoven 2022 | design by tonic

Thank you so much for your sweet note! I’m glad you’re here!
—Eric